RSS
Showing posts with label bread. Show all posts

Monday, March 7, 2011

Creamed Peas on Toast

I've still been sick.  Getting tired of it!  It's hard to think of good, easy meals that I feel like eating.  Today, I thought of a childhood favourite, creamed peas on toast.  I have made it once as an adult, the way I knew how.  A can of mushy peas heated with some flour to make a sauce.  With some things, you can't go back.  Mainly because what may of tasted great as a kid may not be so good when you're grown up.  Once when I was on a liquid diet for a stomach problem, I pureed a can of peas and it was the best thing I ever consumed!  Of course, hunger was a great seasoning when you have gone days on just clear liquids, lol!

I decided to shake it up a bit.  Of course, I used homemade rustic soaked brown bread for the toast instead of the "classic" white toast.  Adds a lot of body.  But the creamed peas, mmmm!  Today, they stole the show :)

This goes together really fast.  It is something that is good even without the toast!  It is too bad I cannot find my camera is it was a lovely meal in taste and sight :)

Creamed Peas on Toast

3 cups of peas (I used frozen but fresh would be good too!)
1 cup of milk (or more if you like a lot of sauce)
1/3-1/2 cup cream cheese (depending on how rich you want it)
1/2 cup chopped onion (red, spanish or sweet)
1 tsp arrowroot powder (optional)
salt and pepper to taste

Put peas and milk in a pot and bring to just below the boiling point.  Turn down the heat and add the cream cheese and onion.  Stir until melted and let simmer for a few minutes.  If there is a lot of liquid, add the arrowroot powder to make a thick creamy sauce.  Season to taste.  Serve ladled on slices of toasted bread.

Note, if you do not like a strong onion flavor, you could either omit the onions or you could sautee them in butter before adding the other ingredients.  I love raw onions and in ours they were just slightly cooked.

Wednesday, January 26, 2011

Low Carb Gluten Free Bread (banana bread version too!)

I debated about putting both these recipes here since I rarely post recipes but why not.  I am too excited not to share.  Anyone who low carbs know how hard it is to get a good bread, especially those not filled with fakey things.  I like my food real, thank you!


There are good recipes out there to be sure but many are filled with things I am trying to avoid.  Vital wheat gluten comes to mind.  A variety of low carb mixes with things I can't pronounce nor get without an expensive order over the internet.  Why can't there be a recipe with ingredients I can get at the store?  Is that so hard?

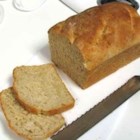
Apparently not because here we have an easy bread recipe that is low carb, gluten free and has simple healthy ingredients I can get at the local health food store, grocery and/or bulk food store.  Bread!  See:


Slices of nice warm bread, very good with butter.  Not only that, I was able to adapt it to make banana bread for the kids.  That isn't so pretty in pictures but sometimes very ugly things are very, very good.  This isn't as low carb but low enough that I feel comfortable eating it (just so you know, there were 6 muffins when I made them and I am home along. Just saying).
So where did I find this great recipe?  Well, I was cruising blogs having to do with paleo and primal blueprint diets and recipes and came across one called "Primal Journey" where she had a recipe for Grain Free Bread. She got it from a blog called "Joyful Abode " (found hereand now I'm sharing it :).  Recipes sure can travel around the internet and I'm sure its been seen in other places too.

Low Carb, Gluten Free Bread
  • 1 cup coconut flour, sifted
  • 1 cup flax seeds, ground and sifted 
  • 1 teaspoon salt
  • 2 teaspoons baking soda
  • 11 eggs 
  • 1/2 cup coconut oil, melted
  • 1/3 cup plain full-fat yogurt
  • 1 Tablespoon apple cider vinegar
Preheat your oven to 325 degrees.  Mix together dry ingredients.  In a separate bowl, whisk together eggs, coconut oil, yogurt, and vinegar.  Pour  the dry ingredients into the wet ingredients in small amounts to incorporate well, mixing after each addition.  Let sit for about 10 minutes to allow the coconut flour to soak up the wet ingredients.  Turn into a greased loaf pan or a silicone pan.  I used a silicone bundt pan for the bread.   Bake until a toothpick comes clean (this depends on what kind of pan you are using.  It took about an hour and a half for mine to come out)  Cool 10 minutes in the pan, then turn out onto a plate, wire rack or a cutting board. Allow to cool completely before slicing.


For the banana bread, the biggest difference is I used one less egg and I added 5 mashed very ripe bananas, 1 tbsp vanilla and 1/3 cup of honey to the wet ingredients.  I also used 1/2 cup of lard left over from when I recently made donuts instead of the coconut oil since I'm being frugal with it (the fat still had a donut flavor and scent to it).


It could of used more sweetening and possible more bananas if you like a strong banana taste.  I found even with 5, the banana taste didn't carry as well as I had expected.  With the chocolate chips, it was delicious!   I will probably only make them as muffins for the kids from now on.  Oh and I baked this in a silicone loaf pan and used a silicone muffin pan.  I love silicone as you do not have to grease it and things pop right out.


I really recommend giving these recipes a try.  I look forward to seeing how my kids like them since I can put them in their lunches.  So many low carb recipes call for nuts as a base and their school is rigidly nut free.  


Part of Kelly The Kitchen Kop's Real Food Wednesday!

Friday, January 7, 2011

Low Carb Biscuit? Bread? Bagel?

Curried Turkey Drummies and Biscuit
I'm not sure what to call it, lol!!

I came across this recipe on the low carb friends message board but it was called and everything bagel.  I love those things!  About 13 years ago, I used to go to the YMCA with one of my friends where we would exercise for an hour then swim.  Afterwards we would always go to Tim Hortons for a bagel with cream cheese, lol!  Everything is the kind I always got.  It kind of defeated the purpose of getting exercise stuffing my face after with those great big carby bagels but I used to find any excuse to get my treats.

I'm usually not a "get off the computer and try something right now" kind of person, but this time I made an exception.  Here is the original recipe then I will post what I did.  The original thread it came from can be found if you click the link in the recipe title:

-----------------------------------------------------------------------------------------------------
Flaxbread "Everything Bagels” Makes 6 bagels. 

Dry: Mix these together (I keep bags of the dry ingredients mixed up in the fridge so it’s easy to put together a batch.) 

½ cup ground flaxmeal (I prefer golden) 
¼ cup almond flour 
1 ½ tsp. baking powder 
1/2 tsp. dry ranch powder 
1/4 tsp. each garlic and onion powder
2 T. parmesan cheese (green can) 
a pinch of salt

Wet: Mix these together: 
2 eggs (I use jumbo) 
2 T. Chia gel, optional. (If not using, replace with more oil. To make gel, mix ¼ cup chia seeds with 2 cups warm water. Stir, then let sit until thick. Store in fridge to add to lots of things. This adds good omega 3s.) 
2 T. oil 
½ cup shredded cheddar
Preheat oven to 350. Add dry ingredients to wet, stirring to blend. Let sit for 5 minutes. Divide batter evenly into a greased or sprayed muffin top pan. 

“Everything” Topping:
(I don’t measure, but just sprinkle on a little bit of each of the following: 
dehydrated onion and garlic flakes, kosher or sea salt, poppy and sesame seeds.
Bake in muffin top pan at 350 for 12-14 minutes.

The basic bread is 1 carb per bun. I don't know if the toppings change the count or not. The sesame seeds are net 0, but I know the onion and garlic can add up, depending on how much you use.
---------------------------------------------------------------------------------


Ok, I'm back :).  I am in the process of cracking almonds as I want to see if it is more cost efficient to buy them in the shell so I used raw hulled sunflower seeds and the flax was whole (I keep it in the freezer).  I think you could use any nut or seed in this.  I didn't use the ranch mix.  I measured all the dry ingredients into a magic bullet cup and pulse blended until the flax and seeds were ground into a flour-like consistency.  I dumped it into a bowl and mixed in the wet ingredients, using an extra egg and yogurt instead of chia seed gel (which I plan to make when I can get my hands on some chia seeds).  I don't have a muffin top pan so I baked on a silicone baking sheet (wanted to try it out, great for not sticking!).  I also didn't add all the toppings, just topped with some dried onion since I love onion.  


These were delicious!  The onion and garlic taste wasn't strong enough in my opinion, so I would definitely add more, fresh would be better.  I am planning to try variations of it for different tastes.  I was tempted to make some to keep in the fridge or freezer but I know flax is best when just ground.


I had two for supper and have been drinking a lot of water as after I realized, that is a lot of fiber, lol!  I ate them warm slathered with butter, yum!  They are sturdy enough to use as a bun or as "bread" for a sandwich.  I am thinking egg salad, drool!


Now, in the picture I have the curried turkey drumsticks I made.  They didn't taste good to me so I tossed them after a couple of bites.  They were quite freezer burnt and they were just cheap grocery store freezer....stuff but I initially didn't want to waste them (they baked when I was making other things in the oven).  To make, I just put the drumsticks on a parchment paper covered baking sheet and sprinkle liberally with my curry blend powder and bake at 350-400 degrees.  Halfway through, I turn and coat the other side.  Bake until done, nice and crispy.


(note, I don't know why some of my posts get kind of funky halfway through.  I can't figure it out!)

Thursday, September 30, 2010

Bread, muffins and granola, oh my!

I mentioned the soaked bread I was attempting in the bread machine. Despite losing a lot of liquid, it was a sucess! It rose well, has a wonderful consistency and is yummy. The kids aren't so crazy about it, but they'll live ;). It is good and slices easily for sandwiches.

I made some banana chocolate chip muffins out of the Pharoh's mix I mentioned the other day. Yummers! I actually followed the coffee cake recipe but added an extra egg, 2 cups of mushed banana (there were big chunks of banana in the muffins adding to the yumminess) and a cup of chocolate chips. I put the batter in my heart shaped silicone muffin liners (it made 14) and baked for about a half an hour. So good!! They are moist, tasty and are a definate must make again :). Pretty good for a spelt and kamut muffin! Actually, I was telling DH they are more like a cup cake, but healthier :)

Granola. It is my first attempt at making soaked granola. It has been in the dehydrator for a few hours and I am just now realizing all the things I did wrong, lol! To backtrack, I loosely was following a recipe online. I soaked 3 cups of organic "New found" oats, 1 cup steel cup oats, 1 cup spelt flakes and a cup of spelt flour with 5 cups of water and 6 tablespoons of kefir. I also added a cup of raw sunflower seeds. I let it soak nearly 24 hours then I added 1/2 cup of honey, 1/4 cup dark brown sugar, 1 cup of chocolate chips (need to wean the kids into homemade goodies again with some chocolate) and some vanilla. I mixed well, loaded up the dehydrator and realized, I forgot salt, coconut oil and some other things I meant to put in. At least I will know for next time. It was very soupy. Next time I will follow a recipe properly. I won't post what I used for embarrassment of messing up so badly. It may still turn out good so I won't discount it yet. I want to make granola for the kids that don't have nuts since they can't have any nuts at all at school, except coconut.

In other news, we are going to the valley tomorrow, yay! I plan to come home with about 200lbs or more of fresh fall produce. Carrots and turnip/rutabagas to put up in sawdust, squash, pumpkins, kale to dry, another gallon of honey, a big bag of organic sugar and more. I imagine our trunk will be FULL!! I want to go to the place that has pork. I couldn't decide between a side of pork or a quarter beef first, but I think I will go with the beef since we have a ton of pork in the freezer. I will pick up some of their natural bacon and maybe some sausage. I will have to bring a cooler! It's just a day trip, but it will be productive.

As well, I plan on taking part in The Nourished Kitchen's Real Food For Real Families series. It is a low cost approach to real food on a budget. I look forward to it! Our budget is shrinking while our food needs keep growing.

Well, my Monday Market Report should be a little bigger than usual, but it will feed us a good long time!

Monday, September 20, 2010

Beef Stew


One of the dishes made with our market food was beef stew. I made this a little differently than usual since it was a small amount and I wanted to make it fast. We finally tried the King Limousin beef and it was good. It is grass fed and pastured. She said they take them right off the meadow when it comes time for slaughtering (not a nice visual, but it is what I'm looking for). No antibiotics or hormones and they are now a registered organic beef farm, although their first batch of organic beef won't be on the market until next year. Their cows are still all raised the same though.

So it was $3.25 for a pound of stewing meat, which is fairly comparable to what you buy in the grocery store. It was very lean and a little tough, but that is probably because I cooked it too fast. Stewing meat is best cooked long and slow. We were just too hungry!

So I browned one pound of stewing meat in a little bacon fat.

Meanwhile, I washed, peeled and sliced 5 carrots, 2 parsnips, an onion and a leek (you can add what you like, whatever is in season. I added most of the leek greens about 5 minutes before the stew was done).

After the meat was done browning, about the time I was done the veggies, I added the vegetables, a couple cups of water, a sprinkle of sea salt, covered and let simmer for about 25 minutes or so until all the vegetables were tender.

Oh, I also cut the beef in smaller pieces after adding the vegetables but you can do this before adding them or even before cooking. I just hate cutting raw meat. You can leave it in big chunks if you like but it will take longer to cook.

I then added a tablespoon of cornstarch to a cup of water, mixed well and added to the frying pan, stirred well to make sure it mixed well to make a thin gravy. You can add more cornstarch if you want a thicker gravy or even use a different thickener all together or just leave it soupy.

Serve with homemade bread!

I will soon be posting my bread recipe. I've made it several times now and it is the best one I've used!

Wednesday, March 31, 2010

Gluten-Free Crusty Boule

Artisan Bread in Five Minutes a Day � Gluten-Free Crusty Boule

I have been perusing this site because I want more information on the 5 minute a day bread (which I will make as soon as I arrange my fridge a little better). I was pleasantly surprised to see there was gluten free bread! I don't know if I can get the ingredients here but maybe someday. Sometimes it is nice just having the option.

As a side note, I don't think I am going to be buying and grinding our wheat. I have my limits. It is too hard, time consuming and I don't get favourable results.

Another side note, from the above site, I finally found out how to make proper hamburger buns. Bake them in english muffin tins! How easy is that? I had one but it got warped so I went and bought all they had at Bulk Barn (note, they are sold as large 4" circle cutters but they are exactly the same as the ones online and much cheaper). I didn't realize you actually baked it with the dough in the round. So that will make making buns easier, especially if I keep dough in the fridge. Now, if I could only figure out hot dog buns....

Thursday, March 25, 2010

Bread FAIL!

So I wanted to get back into the swing of regular bread making again. I made a few good loaves with home ground flour with the addition of some regular flour in the bread machine. I had a bad one but the next day I realized it was because I did not have warm water to activate the yeast since I had it soaking overnight. I knew for next time.

Today I wanted to make some bread. I put it on the sandwich setting, which is a 3 hour setting. It rose beautifully. I had to leave and when I got home, it looked bad. It is the loaf on the far left. After cutting into it, it totally sunk. I used half regular flour and half sprouted wheat flour. I tried to figure out what was wrong. Apparently it rose too much and didn't have enough flour to create a solid loaf, so it sunk when it started baking. Boo hiss. Tastes good though, although it didn't fully cook in the middle (which I didn't realize until later). Sprouted wheat flour acts as an enhancer for dough which makes the bread rise more so I probably added too much yeast causing the collapse.

So after the bread machine cooled down, I thought I would try another loaf, my regular way with only half a cup of the sprouted wheat flour. I did the quick setting, which is one hour, start to finish. That is the bottom right loaf. I don't think it cooked all the way through. It is pretty short and solid and not done on the top. After taking it out, it sunk a lot in the middle. It hasn't been cut into but I suspect it isn't baked through. Sigh.

My banana bread came out great! I made it in the crockpot in a silicone loaf pan. I should of packed some foil around it to keep the loaf shape as it spread out in the middle. Still, otherwise really good!

So what I may have to start doing is baking it in the oven. If I have to do that, I will bake more than one loaf at a time and also do buns and rolls. If my bread maker isn't cooking all the way through, it's pointless to keep using it. It is still good for mixing and kneading the bread. It is hard for me to do it manually so it will still serve a good purpose. I need to start having a baking day each week.

Wednesday, June 25, 2008

Family Bread


I used to visit http://www.hillbillyhousewife.com/ a lot. She has a lot of great ideas, recipes and frugal menu plans, even if they don't exactly work cost-wise here. I have made this before and decided to make some today. I wasn't able to get to the bread store, so why not. The differences I made were I used 1.5 cups of 12 grain cereal and 1.5 cups of flax meal and a little more water and maybe some more flour. It made 3 loaves and 2 pizzas for me. It's not done cooking yet but it sure smells yummy!

BTW, the commentary is all from the website, not mine :)

Family Bread
  • 4 cups warm tap water (not hot)
  • 2/3 cup non-fat dry milk powder (instant powdered milk)
  • 1/3 cup sugar or 1/4 cup honey
  • 2 packets or 4 teaspoons dry yeast
  • 1 tablespoon salt
  • 1/3 cup melted margarine or oil
  • 12 cups (approximately) white or whole wheat flour or a combination

The first thing you need is a big bowl or clean dish pan to mix this up in. Mix the water, dry milk powder and sugar in the dishpan or bowl. Add the yeast, sort of sprinkled on top. Allow the mixture to sit until the yeast dissolves some, this will only take a couple of minutes. Add the salt, margarine or oil, and flour. Mix with a wooden spoon until it gets too stiff and then dig in with your hands. When the dough is in a nice cohesive ball, turn it out onto a floured kitchen table or counter. Or if you are using a dish pan, you can just leave it in there.

Now start kneading the dough with all of the love you have for your family. Press the dough and send big love vibes into it. Stretch the dough and impress all of your compassion and generosity into it. Remember why you love your kids, and your spouse and your mom or you dad, and just put it all into the dough. Knead it like this for a full ten minutes. Add more flour if you need to as you go along.

Coat the dough with oil, about 2 tablespoons of it, and put it into the bowl or dishpan. Cover it with a towel or plastic wrap and let it set in a warm place to rise for about an hour or so. It should double in bulk. It may take up to two hours on cool days, or in the air conditioning, so be patient.

Punch down the dough by literally pressing your fist into the center of it. Divide the dough into 4 equal lumps. Coax them into loaf shapes and place them into large (9 by 5-inch) well oiled loaf pans. If you don't have enough loaf pans, use casserole pans or cake pans, or whatever. Cover the dough with a cloth or more plastic wrap and let it rise again. It should take less time for the second rising. When the dough is risen up enough, bake the loaves at 350° for 40 minutes.

You can tell the dough is done if you turn it out of the pan and thump the bottom with your finger. It should make a dull hollow sound. If it doesn't sound hollow, put it back into the pan and cook it some more. Makes four loaves.

Wednesday, April 25, 2007

My New Favorite Bread Recipe


Here is my new favorite bread recipe.

I sustitute a cup of flour for flax meal and I think I'm going to try and add a cup of bran to the next batch I make. I also used some honey with less brown sugar because DH likes a touch of honey in his bread. I also make this totally by hand. Oh, and I only got 4 large loaves when I made it, but it lasted and was soo moist until it was gone. The kids love this bread! Making bread is an excellent arm workout ;). I will be making a batch today.

Fabulous Homemade Bread Recipe
INGREDIENTS
  • 1/2 cup warm water
  • 3 (.25 ounce) packages active dry yeast
  • 1/4 cup bread flour
  • 1 tablespoon white sugar
  • 2 cups quick cooking oats
  • 2 cups whole wheat flour
  • 4 1/2 cups warm water
  • 1 1/2 tablespoons salt
  • 2/3 cup brown sugar
  • 2/3 cup vegetable oil
  • 10 cups bread flour

DIRECTIONS

  1. In the mixing bowl of an electric mixer, stir together 1/2 cup warm water, 1 tablespoon sugar, 1/4 cup bread flour, and yeast. Let grow for about 5 minutes. It will bubble almost immediately.
  2. Measure oats, 4 1/2 cups warm water, whole wheat flour, salt, 2/3 cup sugar, and 2/3 cup oil into the mixing bowl. Mix on low speed with a dough hook for 1 to 2 minutes. Increase speed slightly, and begin adding bread flour 1/2 to 1 cup at a time until dough pulls away from sides of bowl. Humidity determines how much flour you need before the bread pulls away from the edge of the bowl. It is normal for the dough to be sticky.
  3. Place dough in an oiled bowl, and turn to coat the surface. Cover with a damp cloth. Let rise in a warm spot for 1 hour, or until doubled in size.
  4. Divide dough into 6 pieces. Shape loaves, and place in greased 8 x 4 inch pans. Let rise until dough is 1 inch above rim of pans, usually 1 hour.
  5. Bake at 350 degrees F ( 175 degrees C) for 35 minutes, or until tops are browned. Let cool in pans for 10 minutes, and then turn out onto wire racks to cool completely.